How to configure DSTAT to Import from
SMS-Host How to configure DSTAT to Import from
SMS-Host
How to configure DSTAT to Import from
SMS-Host How to configure DSTAT to Import from
SMS-HostThe SMS-Host data is stored in a Foxpro database format on your network typically in a folder named H:\HOSTPLUS. DSTAT will read PMS data directly from this database using ODBC drivers installed on the local workstation. Instructions for setting up the local workstation are found in the section titled SMS-Host PMS Import Setup for DSTAT.
The next step to importing the SMS-Host values is to setup the workstation to read the files from the pre-determined locaiton on your network. Follow the instructions in the section titled 'Setup PMS Interface' to assure that the SMS-Host data will be read on your workstation. This particular setting is by user by workstation. That way, one workstation can be setup to import the data (e.g. the Night Audit workstation) while other users assume that the data has already been read.
A message is display stating "Importing HOSTPLUS data for: ..." letting you know that the data has been found. This data will be read into the 'Gross Amount' column. This column should be locked to user input. The adjustment column should be used to make any necessary adjustments to the imported value.
The sections that read from SMS-Host into DSTAT should be configured with Balance Check lines. When the Balance Check is not zero, you should first verify that all the data transferred completely from SMS-Host to DSTAT. Print the Transaction Summary Totals report in SMS-Host and compare the values to the DSTAT values.
If SMS-Host is in Balance but DSTAT is not, then use the information below to check the Input Configuration in DSTAT. Likely issues are:
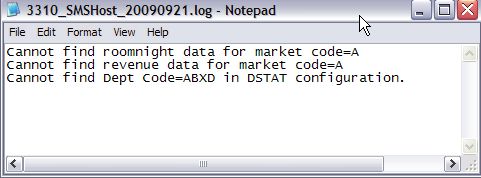
When the interface runs, a Log file is generated indicating any data that is used by DSTAT. You can examine the log file using Windows Notepad to see what PMS code may need to be added. The filename is in the form pppp_SMSHost_yyyymmdd.log where pppp is the property code and yyyymmdd is the date. A sample log file looks like that below:
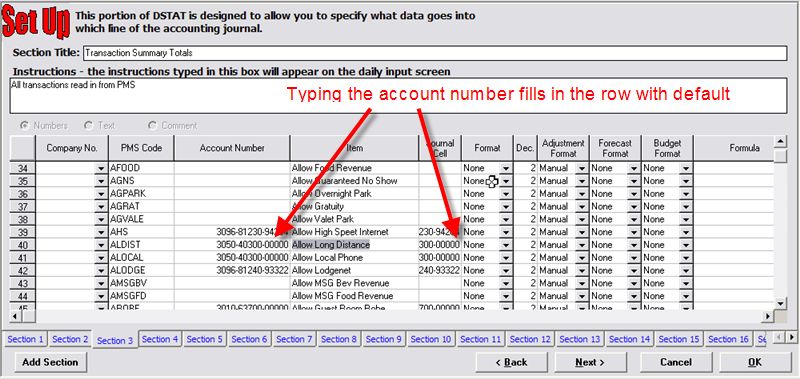
Special codes have to be entered for each row in the Input Configuration for DSTAT to pull the correct values from the SMS-Host PMS. All of these codes are entered in the column labeled �PMS Code�.
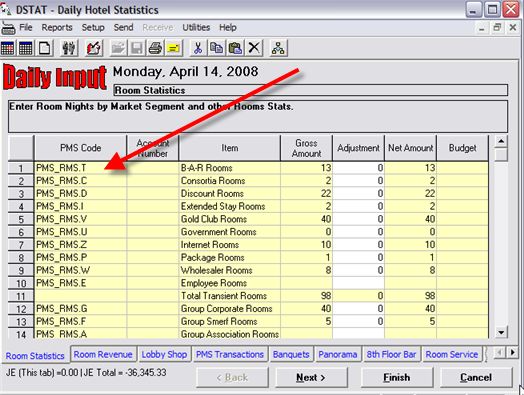
If a row in DSTAT is Market Code Roomnights, the Market Code is entered into
the PMS Code column with the prefix �PMS_RMS.� For example, for
market segment T, the PMS Code is PMS_RMS.T
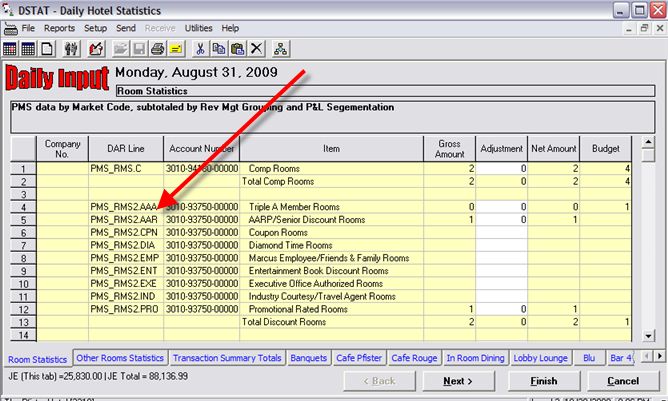
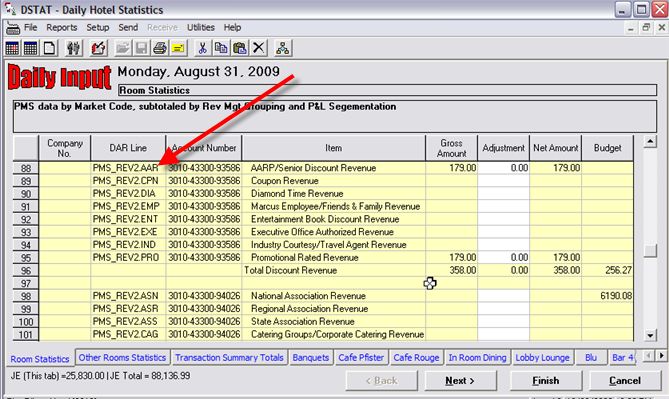
For sub-market codes, use the prefix 'PMS_RMS2.' For example, enter PMS_RMS2.AAR for submarket AAR.
If a row in DSTAT is Market Code Revenue, the Market Code is entered into the PMS Code column with the prefix 'PMS_REV.'. For example, for market segment T, the PMS Code is PMS_REV.T
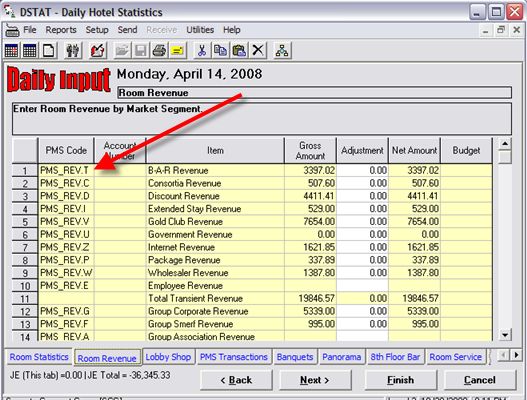
For sub-market codes, use the prefix 'PMS_REV2.' For example, enter PMS_REV2.AAR for submarket AAR.
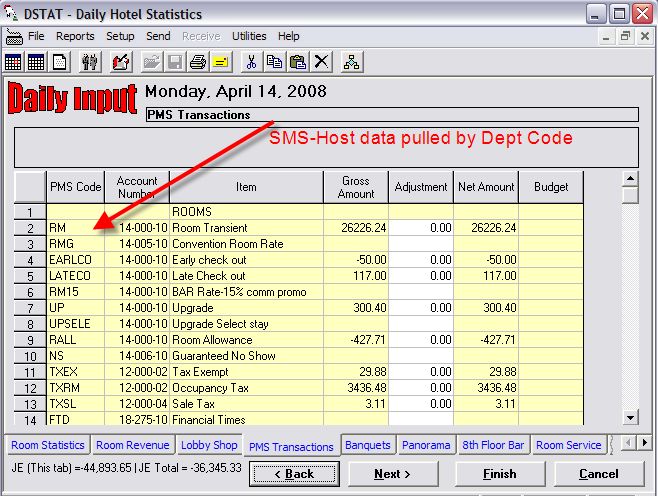
Dept Codes
If a row in DSTAT is a SMS-Host Transaction (Dept) Code value, the Transaction Code is entered in the PMS Code column. Multiple rows in the DSTAT configuration may use the same Transaction Code.
In addition to Market Segment values and Dept Code Values, DSTAT can pull specific statistical data from SMS-Host. These are preceeded by an asterisk (*) so that are uniquely identified. The asterisk is followed by a database table name, a period and then the database field name.
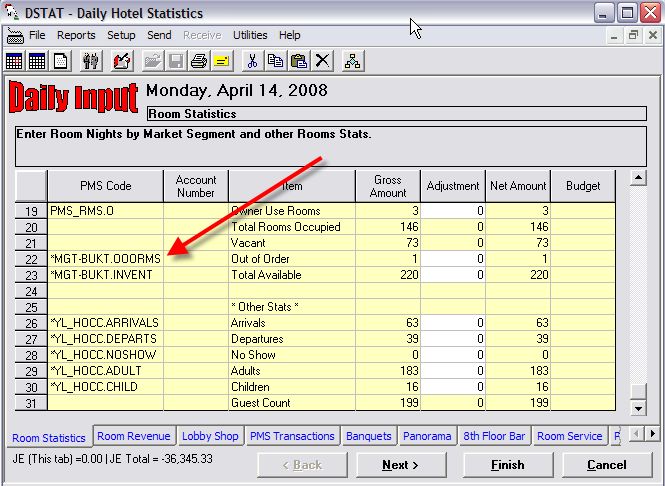
some of the typical statistical values pulled are:
| PMSCode | Item |
|---|---|
| *MGT-BUKT.ARRIVALS | Arrivals |
| *MGT-BUKT.DEPARTS | Departures |
| *MGT-BUKT.GUESTS | Guest Count (Adult Tonite) |
| *MGT-BUKT.INVENT | Total Available |
| *MGT-BUKT.OCCRMS | Occ. Total Rooms |
| *MGT-BUKT.OCCUP1 | Occ. Single Rooms |
| *MGT-BUKT.OCCUP2 | Occ. Double Rooms |
| *MGT-BUKT.OOORMS | OOO Tonight |
| *MGT-BUKT.SAMEDAYCAN | Same Day Cancels |
| *MGT-BUKT.SAMEDAYRES | Same Day Reservations |
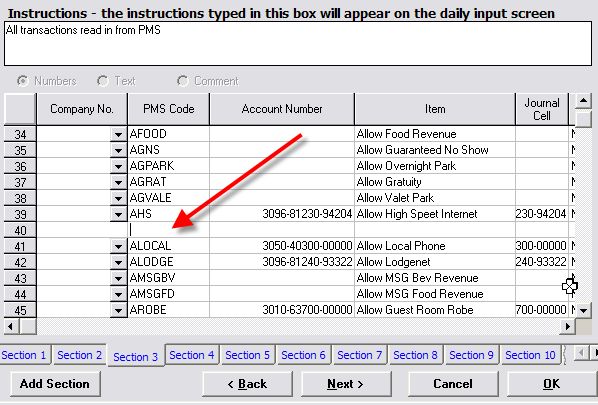
To add an item in DSTAT, select Input Configuration from the Setup Menu or the Toolbar. Click on the line where you want to insert an item and press Ctrl-I. This opens a blank line:
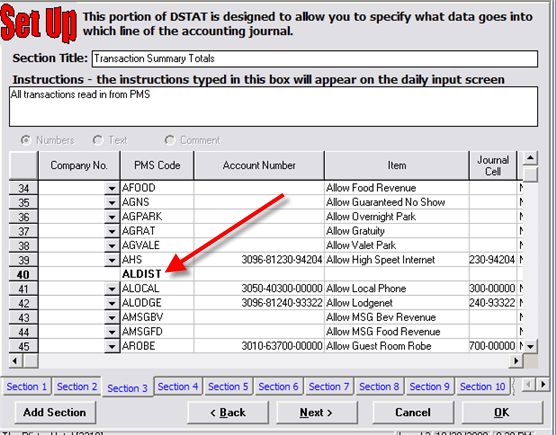
Next, type the PMS code and tab to the Account Number column:
If this is an item that is linked to an account number, typing a valid account number will fill in the rest of the information for the item. If this item is not linked to an account, leave the account number cell blank and fill in the rest of the row manually. Note that the item description defaults to the account name which you can type over to enter a more specific description.